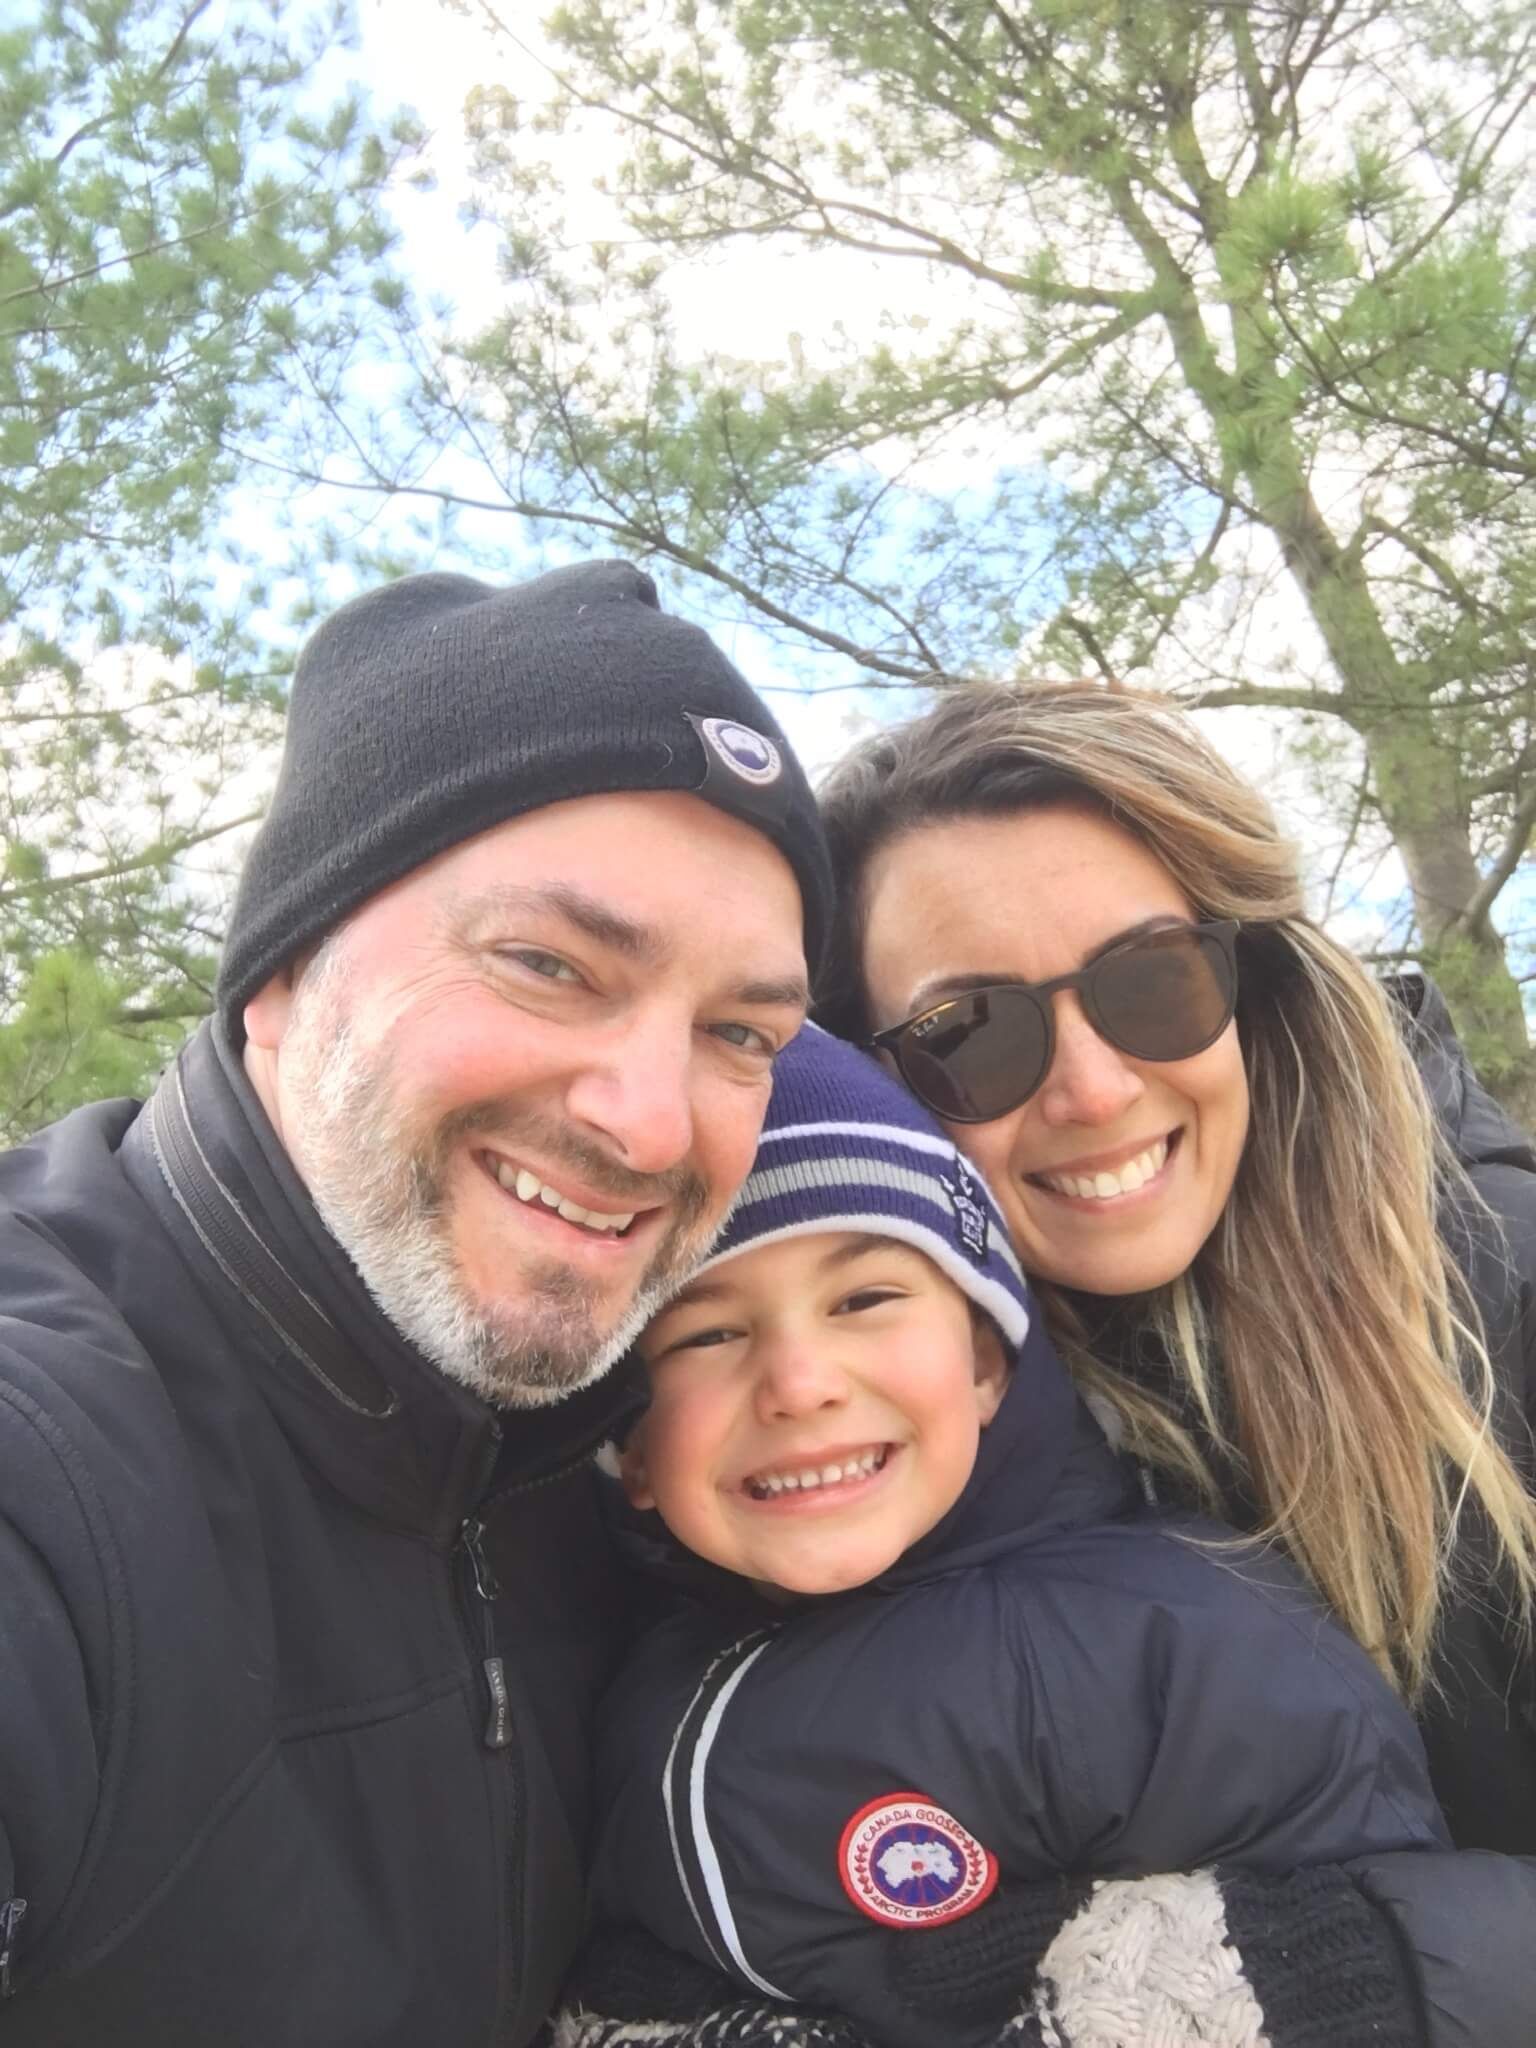
Women Celebrating Women
Make a DonationFeatures
At Suzy’s Cake Angels, we are passionate and committed to creating and designing custom cakes and a variety of confections. We also like to share our tips, tools, recipes and favourite tidbits on all things sweet. There is a lot of love to share!
We will be posting our favourite recipes with you and encourage you to try them, taste them and share a picture of your final product with us using #suzyscakeangels .
We hope you enjoy all that we have to offer, including all the fun and joy that come along with baking!
Feel the love, taste the love!
Mother’s Day
Celebrations have certainly taken a turn this year. Celebrating Mother’s Day looked and felt very different with the COVID-19 outbreak. Traditionally, my boys spoil me by taking me to one of my favourite breakfast spots after letting me sleep in, followed by a day in the park and afternoon visits to see our mothers. Although some things remained the same, like sleeping in and my favourite breakfast, and most importantly being with my boys, isolation kept our visits physically distant from our families.
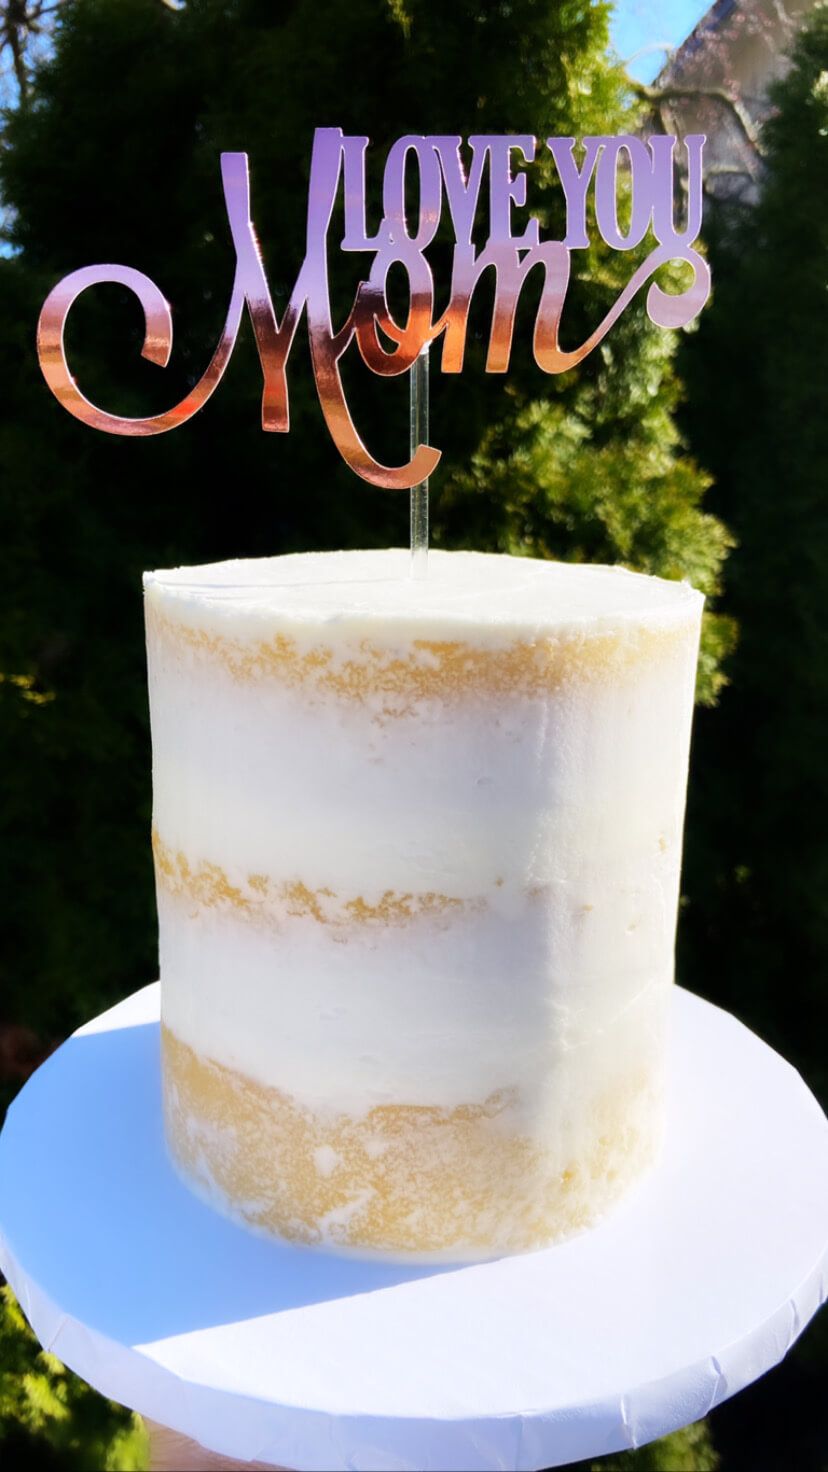
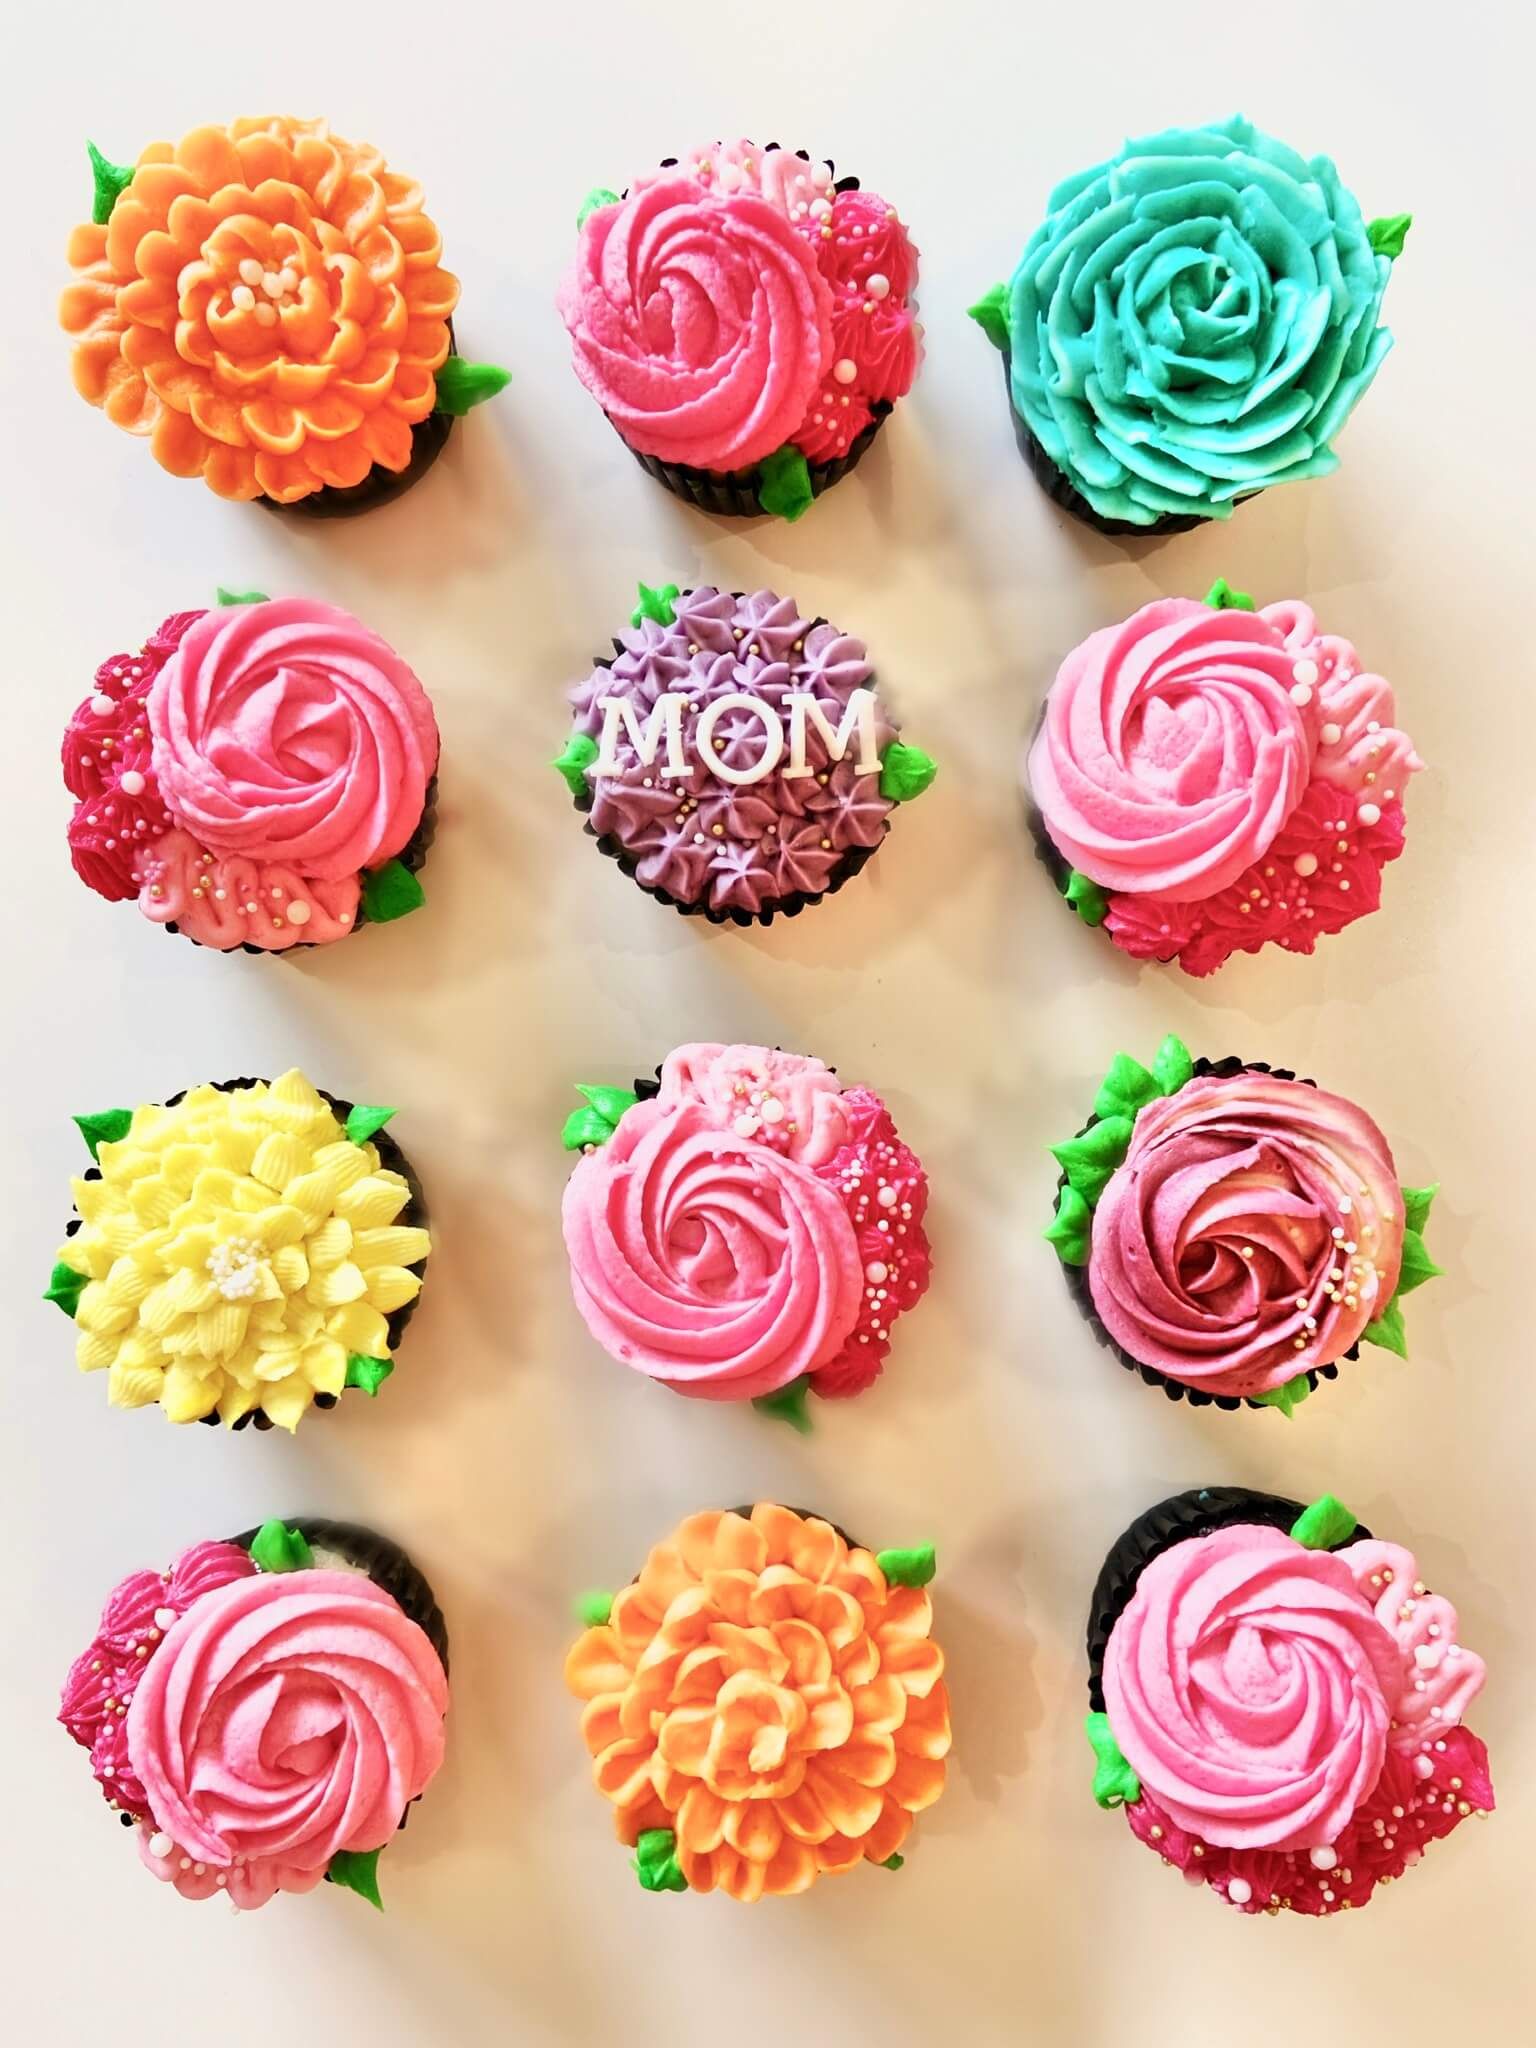
This year, given that Mother’s Day was looking and feeling different, I really wanted to create something very unique to celebrate all the special moms out there. In addition to offering a simple naked buttercream cake with a beautiful Mother’s Day topper from my girl at The Paper Barn & Co., I was inspired by the natural beauty of flowers. Specifically, a flower bouquet, as its often associated with expressing and acknowledging love and affection. So why not translate that beauty into something edible and delicious? Yup, I created my very own Mother’s Day Cupcake Bouquet! It consisted of a dozen cupcakes (a combination of vanilla and chocolate flavours), each one individually decorated, bringing it back to basics with piping. I piped unique and colorful flowers on each one of the cupcakes. There truly is so much beauty in the simple things. Hope you all had a happy and healthy Mother’s Day!
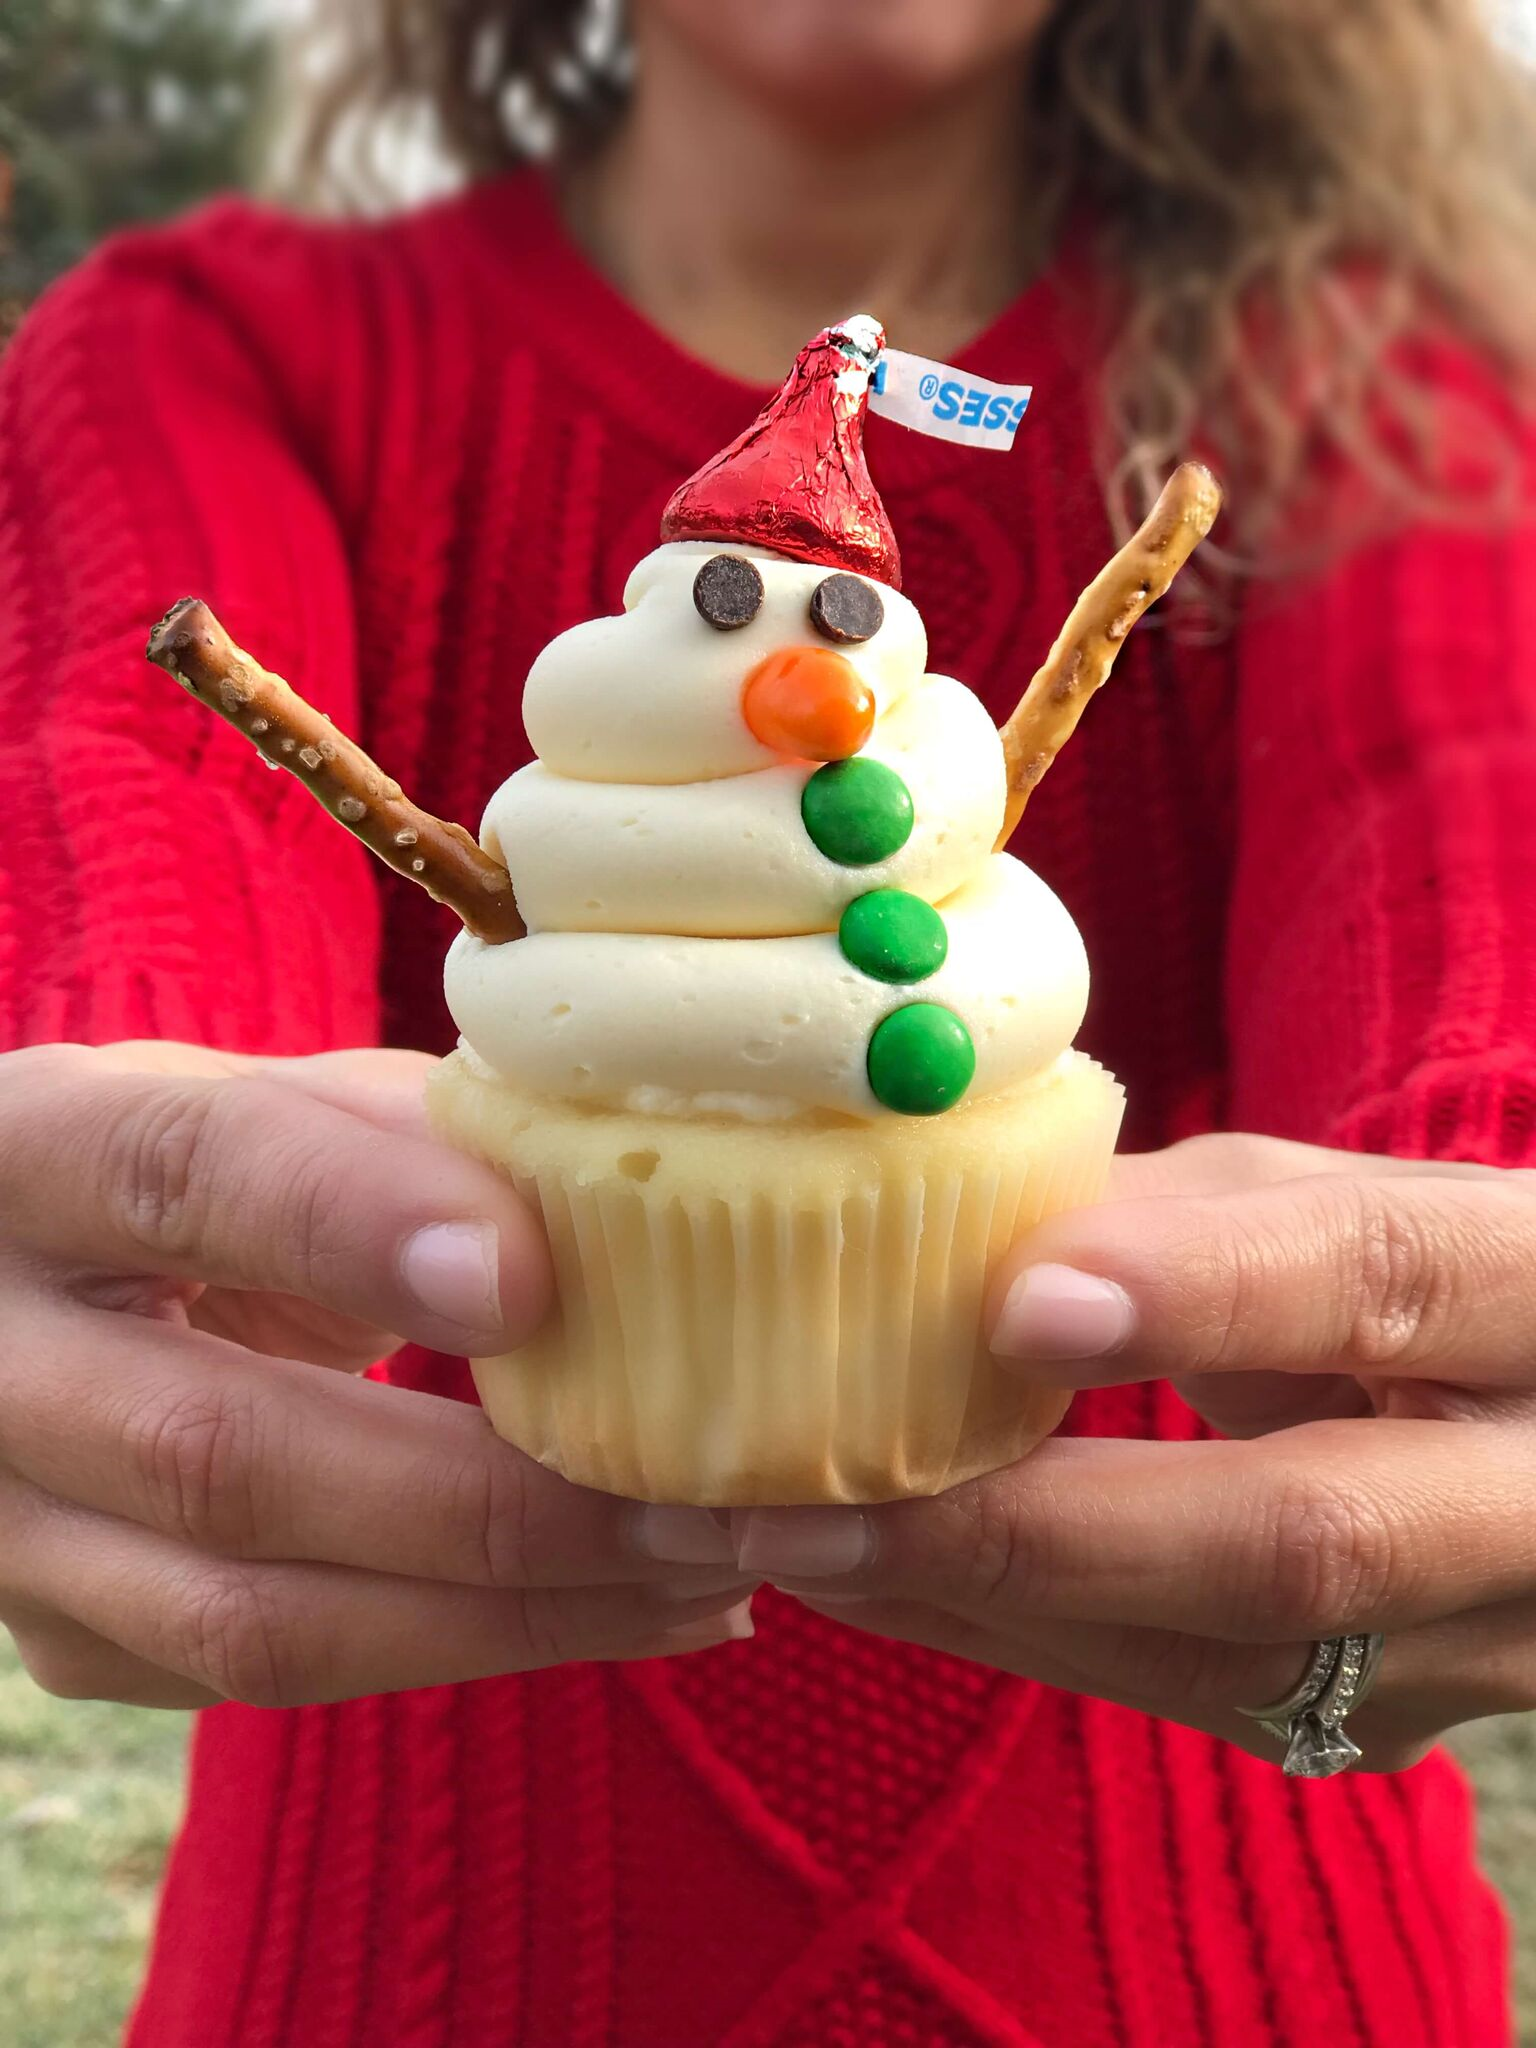
Building a Snowman
The holiday season is in full force! The Santa Clause Parade has come and gone, holiday music is playing in all the stores (and selective radio stations), holiday movies are regularly on TV, Christmas lights are up and tree decorating is happening, if not already complete. With that all in check, it’s time for some holiday baking. Baking is my favorite part of the season, and for many kids too!
The thought of baking and decorating with kids can be quite demanding for some. As a result, I decided to create a fun and simple decorating activity that you can make yourself or with your little one(s). It’s great for the little ones, especially during the holiday break when you are trying to keep them busy, and you can bring these cupcakes to dinner parties and festivities with family and friends.
Snowman cupcakes are great to get creative, have some fun and most importantly enjoy the results. Below is a list of items you will need, followed with step by step instructions on how to make these enjoyable and creative treats.
Check List:
· Buttercream
· Baked vanilla cupcakes (this works for both regular and mini cupcakes)
· decorating bag or Ziploc bag (disposables are the easiest, once you’re done, you just throw them out)
· Piping Tip #808 (optional)
· Mini or regular chocolate chips (eyes)
· Mini M&Ms (the buttons)
· Hershey Kisses (hat)
· Mini pretzels (sticks or twists – arms)
· orange jelly beans (nose)
You can make these cute snowmen in 3 Steps:
1. Bake your favorite Vanilla cupcake and Buttercream recipe. Let the cupcakes cool off for at least 1 hour. In the meanwhile, make the buttercream. (This is something you can prepare the day or night before, just make sure you keep it sealed in an airtight container to remain fresh).
2. Grab a decorating bag and tip. Fill the bag ¾ of the way. The more you fill, the more difficult it is to squeeze out the buttercream and it will overflow from the top of the bag. Squeeze out the buttercream on top of the cupcakes, making each layer as thick and as large as you would like, and repeat, decreasing the size until you create 3 layers for the snowman. Tip: if you don’t have a piping bag and/or Tip#808, you can simply cut the bottom corner of the bag to your desired size.
3. The fun part! Decorate as desired.
Hope you enjoyed this as much as I did! Share pictures and/or comments and don’t forget to tag me on them #suzyscakeangels
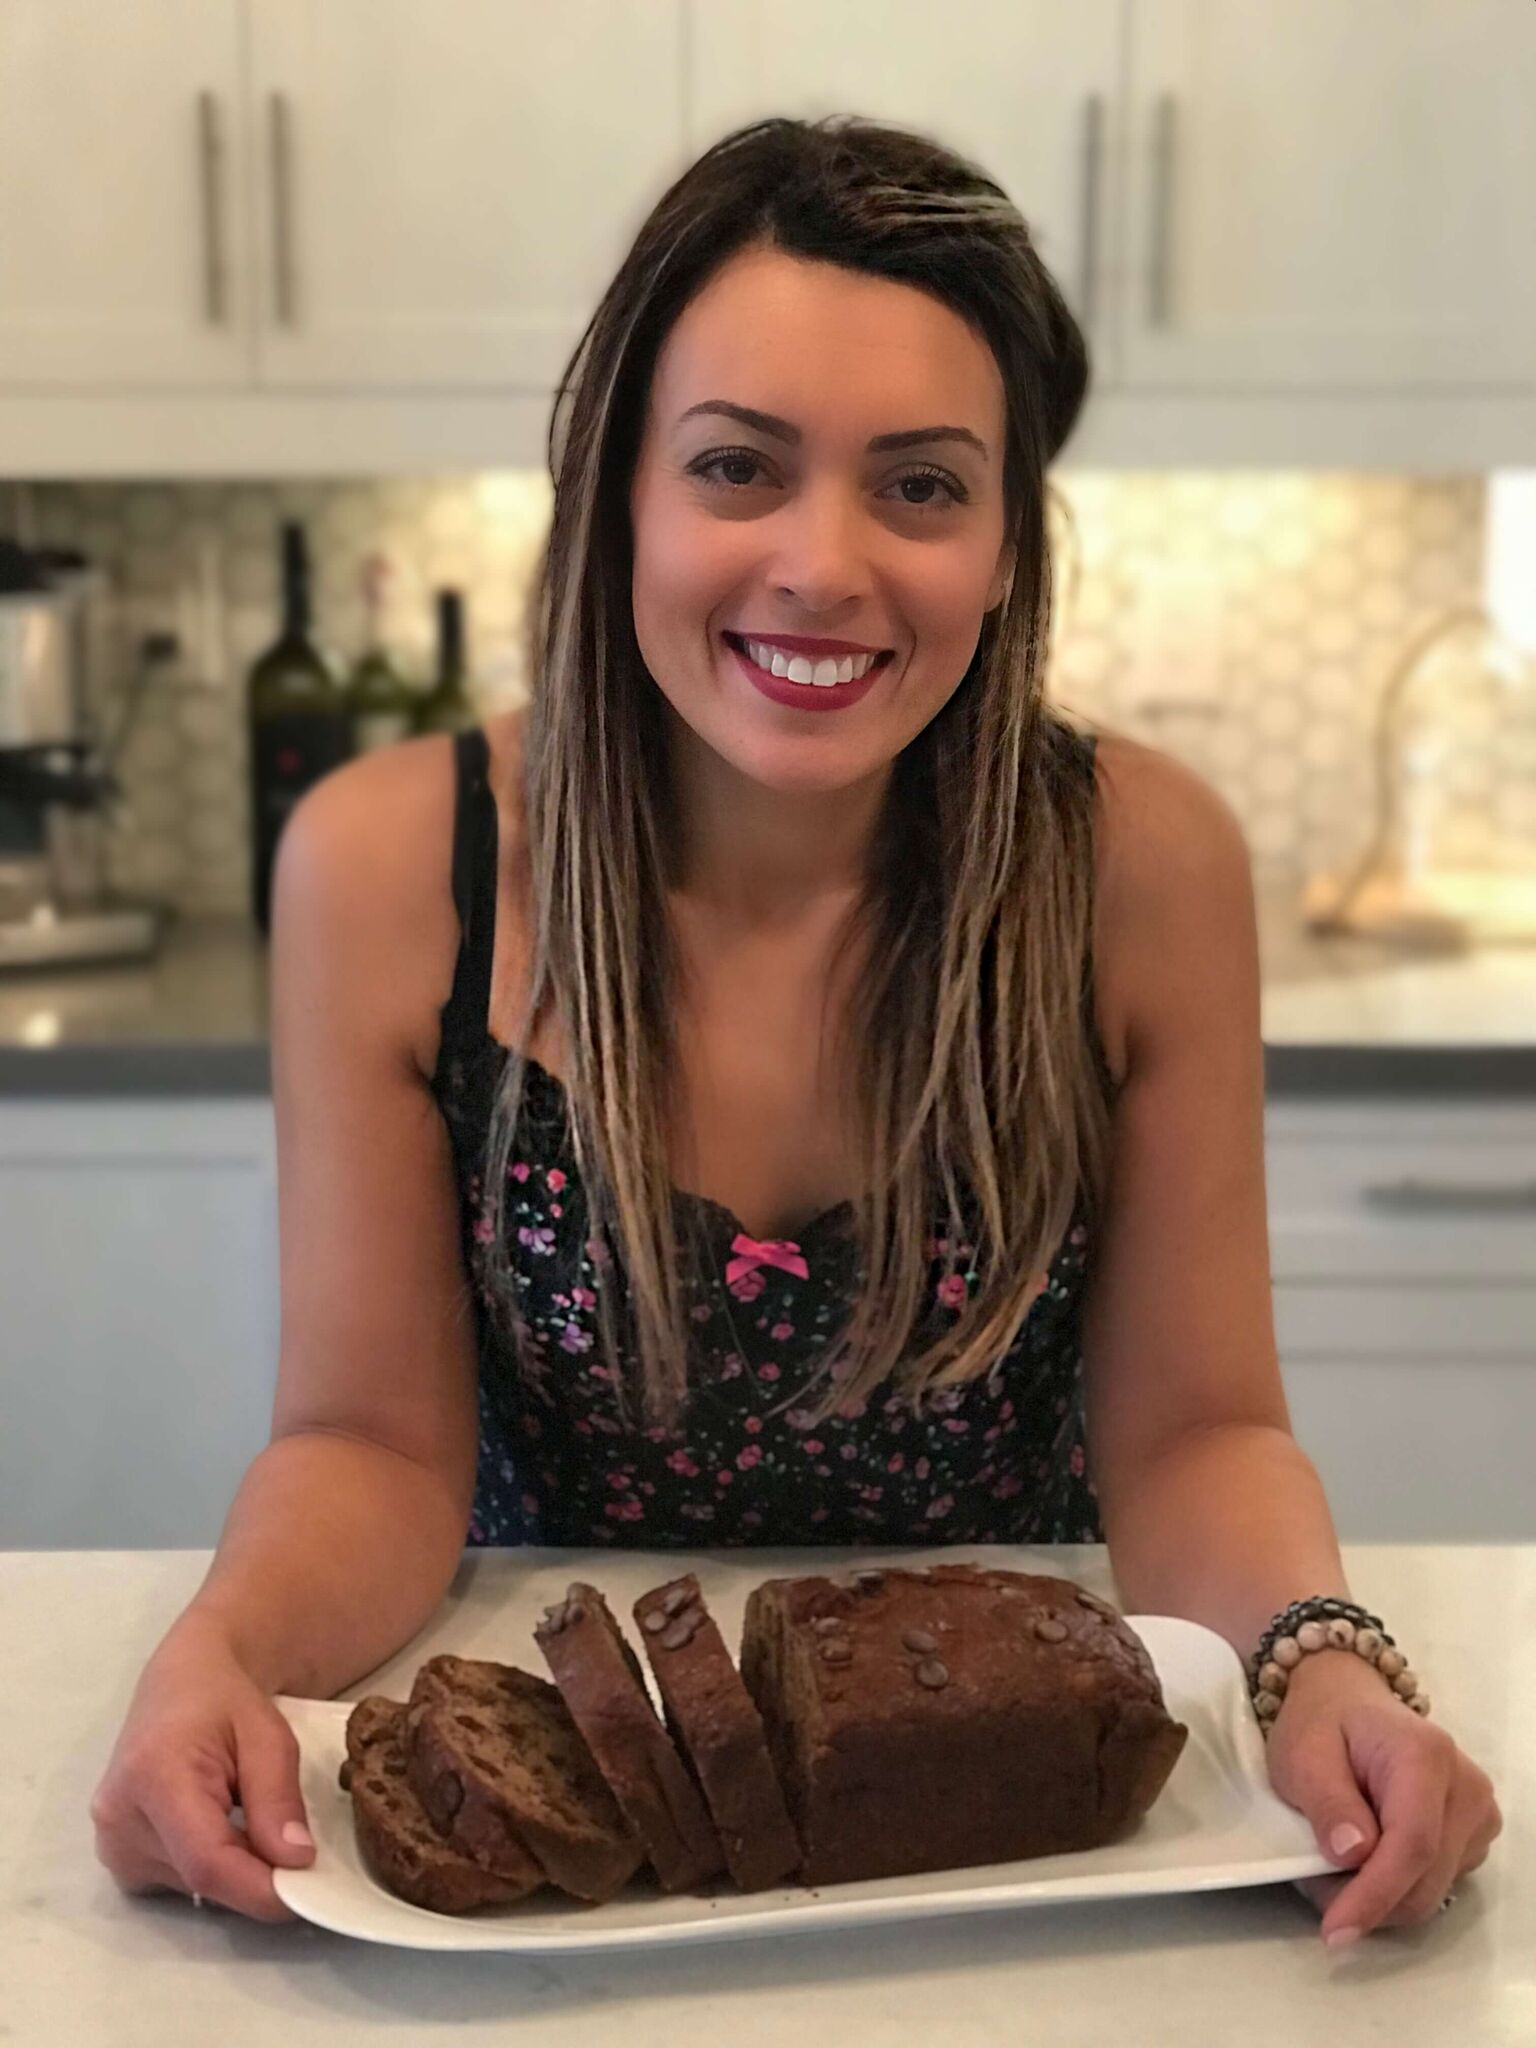
Banana Bread
To some, banana bread is just what it is: ripe bananas mixed in with some flour, sugar, a few eggs, maybe some nuts and chocolate chips. (Side note: for this #passionatebaker, chocolate chips are a must. Banana bread with chocolate just seems so much more complete. It’s like heaven in your mouth!) It is something to make when you have more bananas than you can eat, they are going bad and you don’t want to waste them.
For others, banana bread is more than a combination of ingredients; it’s nostalgia. The smell reminds you of the times your mother would whip up a batch as if it was no work at all, after school or on a Sunday afternoon, when the calmness of the weekend settled in. Perhaps it was an experience, which later became a tradition that you and your mother shared, where the most exciting part was throwing in the last ingredient: the chocolate chips! And let’s be real, there were always more chocolate chips added than the recipe asked for – best part!
Banana bread is a simple go-to treat that never disappoints. It’s one of those sweets that brings people together, especially over a warm cup of coffee or tea. Banana bread is a tradition that I have created in my home. I occasionally make it throughout the year with my son, but more so during the Christmas season, the season of celebrating with family and friends. It is one of those desserts that’s become an unplanned hit, and is always around for both expected and unexpected visits.
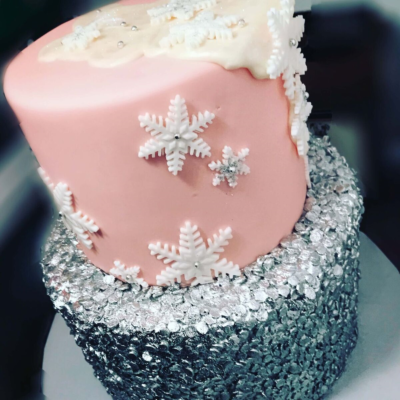
Winter Wonderland
The winter season is coming quickly upon us. The first snowfall has come and gone, leaving behind the excitement of more to come in the air. As we prepare for all things winter, including Christmas, we remember all the gatherings with friends and family that come with it, in between the snowfalls, tree cutting and decorating, and the Christmas shopping, birthdays and celebrations!
Winter Wonderland is such a magical theme. Inspired by all the love and magic of the season, creating, designing and baking a birthday cake for this little one was extremely exciting! In designing this cake, I wanted to understand the meaning of winter wonderland from a child’s view. What feelings and memories pop up? I felt the love, warmth and softness that winter brings: the delicate snowfalls, the snuggles in front of a warm cozy fireplace, the adventures and activities with family and friends, the fascination with snow and overall excitement. I translated all that into the sparkling, silver bottom layer, simply reflecting the love and magic described above!
The top tier, a soft pink, with delicate, sparkling snowflakes, represents the innocence and beauty of this little princess: the magic and joy she herself brings, her excitement and innocence for the love of life.
Bringing it all together, this creation for this baby girl’s first birthday. Happy Birthday Gia!
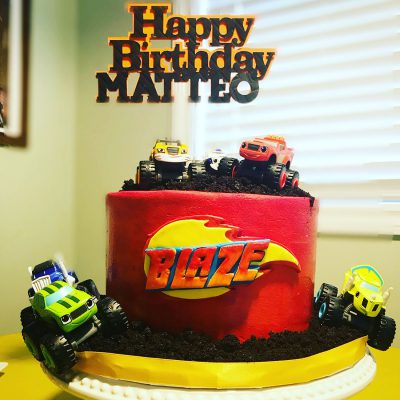
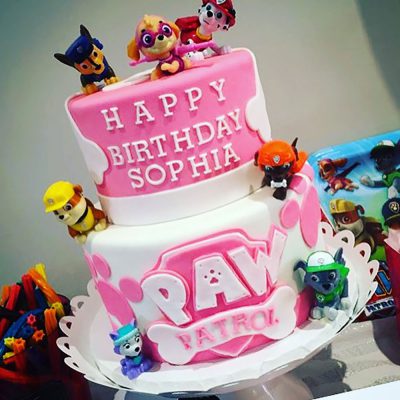
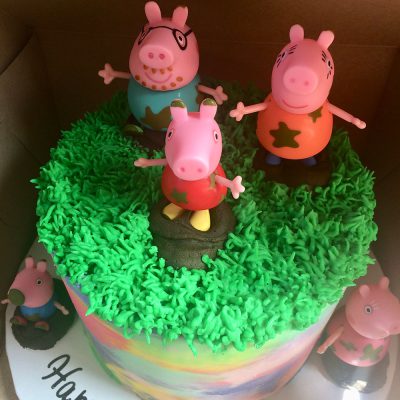
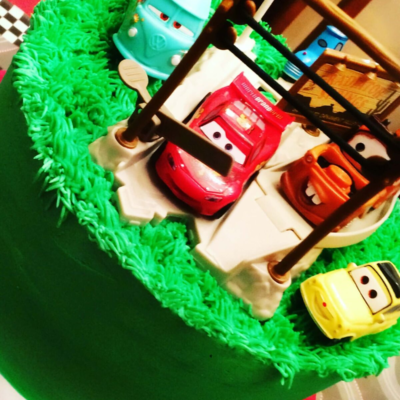
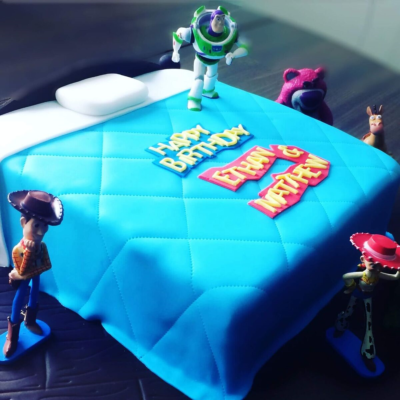
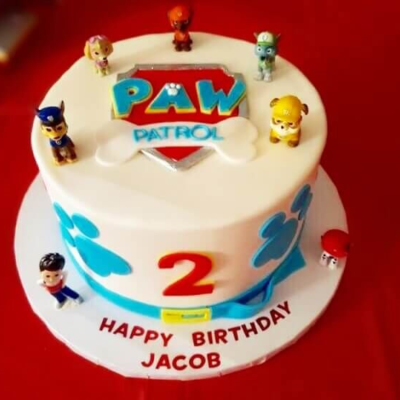
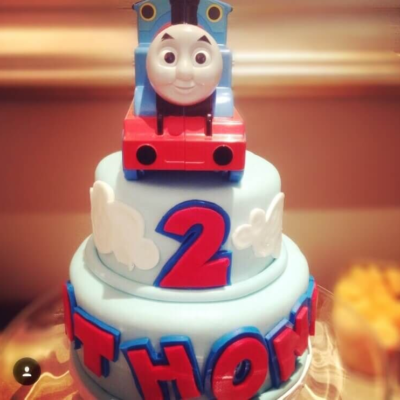
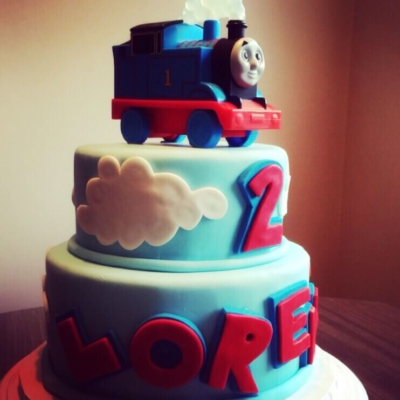
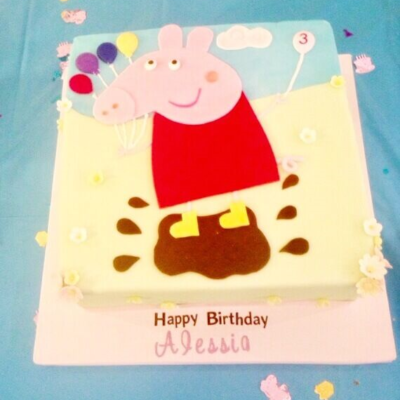
Trendy Cakes for Children
(2 to about 6 years old)
Birthdays are such an exciting time for children and parents alike. For parents, we are flooded with feelings of excitement and gratitude as we celebrate another year of our forever little baby, sometimes overwhelmed with deciding on a theme with your little one and hoping that they won’t change their mind day of, wishing that everything is perfect in order to make them happy because all we want to do is bring them so much joy that they will forever remember this feeling on their special day. But for them, what matters is that we get their favourite character (theme) correct because they build a strong connection with these characters. These characters resemble their everyday activities and life themes at their age, easily captivating their curiosity. Some of the popular ones are, Paw Patrol, Peppa Pig, Cars, Thomas the Train and Blaze. Below are a couple of trendy themed cakes.


A Witch’s Delight
Halloween is such a fun time of the year! From the kids dressing up in costumes of their favourite characters, to going from house to house collecting as much candy as possible, and my favourite – celebrating the season through baking fun and exciting sweets!

This is one of my favourite activities to do with my son on Halloween, baking and decorating cupcakes. You can make these beauties in 3 simple steps:
- Bake your favourite Vanilla Cupcake and Buttercream recipe. Let the cupcakes cool off. In the meanwhile, make the buttercream, once all the ingredients are added and its whipping, add a few drops of purple food paste ( I use Sugarflair Grape Violet) until you get the purple your desire. Tip: if you are using the regular store bought food colour, just note that its diluted and takes away from the consistency of the buttercream.
- Grab a decorating bag and tip – I used ATECO tip #846, and buttercream the tops of your cupcakes.
- The Witch’s hats: using mini ice cream cones (I use No Name Ice Cream cones), spray them with the Wilton’s Black Color Mist Food Colour spray, until completely black, and place them on the tops of the buttercremed cupcakes!
Fun and quick! Share pictures and/or comments and don’t forget to tag me on them #suzyscakeangels
The Pumpkin Spice Cupcake
Fall is one of our favourite times of the year! As the days become cool and crisp, we begin to crave the comfort of heavy sweaters, warm drinks and most importantly, the unparalled autumn flavours of the season come together in a delightful abundance of sweets. Our favourites being pumpkin, cinnamon and cream cheese – everything about that just sounds perfect, inspiring the #passionatebaker to create the recipe below. Enjoy!
Prep: 25-30 mins
Bake: 20 mins + cooling time
Makes: 24 cupcakes
INGREDIENTS:
¾ cup (168g) butter, softened
1 ½ cup (290g) white sugar*
1/3 cup (60g) brown sugar
3 eggs, room temperature
1 small can pumpkin puree (435g)
2 ½ cups (320g) flour
1 Tablespoon pumpkin spice
1 teaspoon baking powder
1 teaspoon cinnamon
1 teaspoon salt
½ teaspoon baking soda
½ ground ginger (optional)
1 cup buttermilk, room temperature
Cream Cheese Buttercream:
1 package (8oz) cream cheese, softened
1/2 cup butter, softened
4 cups confectioner’s sugar
1 teaspoon vanilla extract
2 teaspoons cinnamon (optional)
Pinch of salt
DIRECTIONS:
- Preheat oven to 350 degrees F. Line 2 – 12 cup muffin pans with paper liners and set aside.
- In a large bowl, cream butter on medium-high speed for about 4- 5 minutes, until it is fluffy and almost white in colour. Decrease speed to low, to add in sugar(s). Mix at low-medium speed for about 1-2 minutes until combined. Increase speed to medium-high, occasionally scraping down the sides of the bowl. Lower speed to add eggs, one at a time. Beat until combined with each addition. Increase speed to to medium, and beat for 2 minutes, scraping the sides as needed, to ensure that all is well combined, and consistency is light and fluffy. At low speed, carefully add pumpkin puree slowly. Beat at low until well combined.
- Combine and sift: flour, pumpkin spice, baking powder, cinnamon, salt, baking soda, and ginger.
- Alternate dry ingredients with buttermilk in three parts to creamed mixture, at a low speed. Occasionally scraping the walls of the bowl, mix for about 1-2 minutes on low-medium speed. Careful not to over mix.
- Divide batter between baking cups, filling each about two-thirds full. Bake 20-25 minutes or until toothpick inserted in the center comes out clean. Cool 10 minutes before removing from pans to wire racks to cool completely before buttercreaming.
- Buttercream: Beat the butter on high until almost white in colour and fluffy. On low speed, add confectioner’s sugar gradually and mix until smooth and combined, scraping down the sides of the bowl as needed. Add vanilla and cinnamon. Beat in cream cheese until smooth. Increase the mixer speed to medium-high. Beat until light and fluffy. If needed to adjust the consistency of the buttercream, add in a tablespoon of milk at a time until it is spreadable.
- Grab a decorating bag and tip – I used ATECO tip #846, or an offset spatula, and buttercream the tops of the cupcakes. I don’t like to refrigerate cupcakes because it dries them out, however, if you are not finishing them all within a day or two, refrigerate them in an airtight container.
NOTES:
*I prefer the mixture of both sugars (white and brown). Brown sugar is light and sweet, contributing to the consistency of the batter, and as a result, the texture of the cupcake – both light and fluffy. As well, the amount of sugar required is less because it is a lot sweeter. If your prefer to only use white sugar, use 2 cups (400)g.